Apply varnish properly, maintain it well and it will last far longer.
The application and maintenance of varnish finishes to protect wood from the ravages of sunlight (UV) and the weather.
What is Varnish?
‘Real’ Varnishes
The word “varnish” originally meant a coating made from the drying oils of certain nuts, berries or seeds. These oils react chemically with the oxygen in the air to form a relatively hard or flexible film. They have been used for protecting wood for probably thousands of years. Their “drying” or chemical curing is aided by small amounts of metal compounds called “driers”. These may be added during manufacturing.
The oils are partly chemically reacted by the manufacturer, to make a more flexible, longer-lasting varnish coating on the wood. This is necessary because wood expands and contracts with changes in the weather. Temperature and humidity may cause more than 5% expansion or contraction of wood. An aged varnish film must stretch at least that much. These partly cured resins are very thick [viscous]. Thus some amount of solvent, usually mineral spirits, is added by the manufacturer. This creates a commercial product, easily applied, that will have good performance.
The following application note applies to that kind of material, traditionally known as varnish, either oil-base varnish or alkyd varnish.
Other Varnishes
Other things a merchant may call a kind of “varnish”, such as urethane varnish, water-reducible varnish, latex varnish… I don’t know what these really are. If you are using such a product just do whatever their manufacturer says to do. Many companies, such as Epifanes, make real varnish, high-quality varnish. If you are using a real varnish, here’s an application note about how to apply it.
Why Does Varnish Fail?
Dry film thickness determines life. That’s the first thing to learn. There are many reasons why varnish fails, and there are many ways it fails. A thicker film does not stop them all, but too thin a film guarantees prompt and certain failure. The wood will bleach and gray, the varnish will crack and peel, and. So, we need some minimum film thickness when we apply varnish if we want it to last.
Varnishes also fail by loss of gloss. When you notice this, it means it is time to apply another one to three coats. The ultraviolet absorbers in varnish protect the wood and primer underneath, but the chemical ultraviolet absorbers wear out. The new maintenance coats add more fresh ultraviolet absorbers, and restore the gloss of the finish.
For any varnish, a good rule of thumb is to budget a litre for every two square metres (a Quart to twenty square feet). The most common reason for premature varnish failure is accidentally putting on too thin a total film thickness, by simply not knowing how much of a film thickness one has or one needs. Budgeting a total usage gives a good indicator that there will be an adequate minimum film thickness.
How Many Coats Of Varnish To Apply?
I am not going to tell you how many coats to apply, because there is no standard definition for the wet film thickness of “a coat”. You and I hold our brushes differently, the weather is different here and there, we have different brushes and may even be using different varnishes. Some are typically 60% solids, some 70%, and the viscosity (the property of how easily a liquid flows is called viscosity) may vary by about a factor of three from one varnish to another. So, your coat may be thicker than mine. The same wet coat thickness may sag on a vertical surface but not on a horizontal surface. Even on a horizontal surface, too thick a coat may gel and wrinkle.
Sometimes we need to add a solvent reducer. Some people can apply varnish at a cooler time of day. Others may add some solvent reducer, apply more pressure to the bristle pack. You will do what works for you. The way to discover what that is, if you have not varnished much of anything before, is to practice on a few square feet of low-quality plywood. All the words here are no substitute for a little practical experience. Once you have read, and varnished, and have a certainty that you can do nice work, then start on your boat or front door or whatever the project is.
The Easy Way To Know How Much Varnish To Apply
There is a way to get a standard result. Calculate the amount of material to be used over a given area. Don’t sand heavily between coats, as that takes away film thickness that you need. Wet sanding with 220 to 320 grit just enough to take away the gloss and give a dull matte finish is all you need. The next coat of varnish will chemically bond to the broken molecules of that sanded surface. Thin the varnish as needed so that it brushes out nicely, but you still must use that total amount of varnish over your budgeted area. Keep track of how much material you used in one coat that covered your area and handled nicely, and use that same amount the next time.
Priming the wood to ensure long life
Thinning Varnish to Apply It
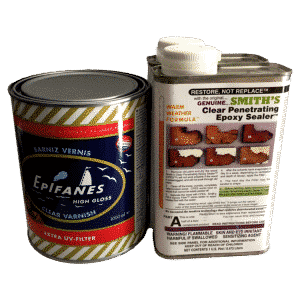
Many sources will recommend thinning a first coat of varnish to aid penetration into the timber and enhance it’s performance as a priming coat. Far better is the use of Smiths Clear Penetrating Epoxy Sealer (CPES), as a fantastic primer, giving additional wood protection from the off.
Priming woods for varnishing
If you prime your timber with CPES it holds varnish far better than if you prime it with thinned varnish. In addition it will last much longer.
CPES will:
- Penetrate significantly further than thinned varnish – this further enhances the grain
- Consolidate the top fibres of the wood, leaving a stable base for the varnish to adhere to
- Leave a microporous finish, allowing the wood to breathe
- Flex with wood, offering a more durable surface than epoxy glass to everyday knocks
- Give you a varnish finish that with proper care and maintenance can last 20 years
- Save you significant effort when sanding as it is far easier to sand, which gives a faster better finish for the topcoats.
So Much CPES is used for priming under varnish we sell it as a kit
Please read here for notes on the use of CPES as a primer to make varnish finishes last. Priming with CPES can make varnish finishes last up to 20 years with proper maintenance.
We sell Epifanes Yacht varnish and Smiths CPES together at a discount if you want a varnish finish that really lasts. Click here to buy our Permanent Exterior Varnish and Primer kit.
Thinning varnish To Avoid Runs
On vertical surfaces you will be applying more coats, possibly thinned a bit more, so that you do not have drips or sags. Applying too much on a vertical surface will cause drips or curtain sags. Add a small amount of solvent reducer (called reducer because it reduces the viscosity, making the material more runny) and the varnish will brush out in a thinner film, and then will not sag, but instead dry and harden as it should.
On a horizontal surface it is easy to apply a very thick coat. Too thick is bad, for the varnish will not cure properly. It will skin over on the surface, stay gummy beneath, and the surface skin will eventually wrinkle and become ugly. Don’t let this happen. Varnish cures (dries) by a chemical reaction with the oxygen in the air. If the film is too thick, the oxygen cannot get to the bottom of the film before the top layer cures. Application at the rate of around 40ml per square metre (approx one fluid ounce to 7 sq feet) per coat will give a wet film thickness of 50 – 75 microns (2-3 thousands of an inch). Much thicker films may not dry and cure well.
What Do I Thin Varnish With?
Solvent thinners do not affect cured varnish life or flexibility, but added oils can. Pay close attention to the manufacturer’s recommendations in this regard.
You can use the commonly available white spirits (mineral spirits) or turpentine as a solvent reducer. In very hot weather these may evaporate too rapidly, giving a coat that does not brush out easily or allow wet edges to blend. Alternatively you can use specialist Varnish Reducers instead of mineral spirits and these will give better varnish flow and leveling in hot weather.
Applying Different Thickness Varnishes – Brush Techniques
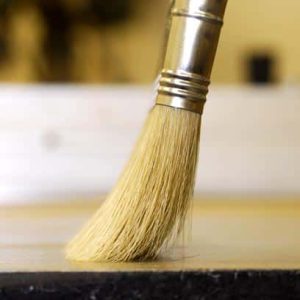
The pressure required on the brush will vary with the viscosity of the varnish. Thinning a varnish will make it less viscous, or more runny, requiring less pressure on the brush.
These bristles are bent considerably. It is necessary to do this if using a more viscous [thicker] varnish. Brush the varnish out to a thin film to avoid drips and sags.
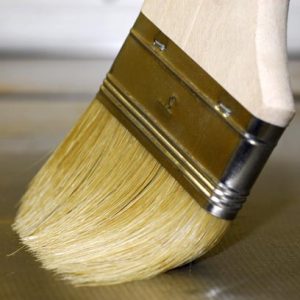
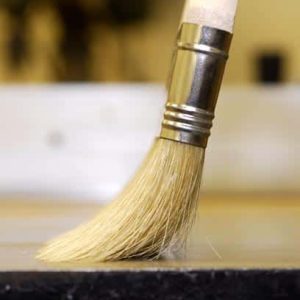
These bristles are bent differently along the width of the brush. Imagine that you are brushing a vertical or horizontal surface, with strokes from left to right, and you started further away and are applying brush-strokes of varnish nearer and nearer to your viewpoint.
The trailing bristles blend in the overlapping part, while the leading bristles apply the varnish to a dry surface.
Brush-marks in the wet varnish film can be entirely eliminated by brushing in this manner, with one pass across the surface. Thus, one will need little or no sanding between coats.
Practice Applying varnish First
There is no substitute for experiments. Reading about someone else’s opinion of what result you are going to achieve is not your result. It can help and guide, but if you have not done this before then experiment on a scrap of wood before you start the project. It is easy to get good results with varnish, but you must practice a bit first.
Well, there’s the basics. That will get you started, and through most jobs. Good luck.
Below is a blow by blow description of how to apply varnish

We have just published detailed instructions on how to achieve thebest most durable finish possible. Our house sign was the subject of this restoration.
We restored it from badly aged bare wood back to the wonderful lustrous highly UV resistant specimen you see here.
https://makewoodgood.com/product/epifanes-high-gloss-varnish/
Read all about how to achieve this look, and the specific benefits of priming with Smiths CPES in our article restoring our exterior wooden sign.